Last updated on 10 November 2023
One of the main attractions of the cyanotype is the simplicity in which it can be used and the equipment required. The second is the diversity of prints that can be produced. In this first article, we’ll look at the basics of the process and the equipment required, before moving on to step-by-step instructions for producing your first photogram.
Later on, we’ll also look at how to print a negative to make a photo print from any image.
A brief introduction

First things first: what is the cyanotype? It’s a monochrome photographic printing process that produces blue images, developed by Sir John Herschel in 1842. The first book to feature photograms made using this process was “British Algae”, by botanist, writer and photographer Anna Atkins.
The cyanotype process uses two chemicals: ammonium ferric citrate and potassium ferricyanide. Purchased in kit form, they come in two bottles whose contents must be mixed in equal parts to obtain a photosensitive solution. This solution is then applied to a support, usually a sheet of paper, which is left to dry in the dark before use. A negative is then placed on the paper and exposed to an ultraviolet light source. After exposure, the print is simply rinsed with water to bring out the characteristic blue of the cyanotype.
The cyanotype print is a contact print: in Herschel’s day, the negative was made on a glass plate in a large-format camera. While it’s always possible to make a print from a “modern” negative (or an old glass negative found in an attic or flea market), the result is often disappointing: lack of detail in shadows and limited contrast. Later on, we’ll look at how to print your own negatives and adapt the contrast to obtain a satisfactory result. But don’t worry, we’ll take it one step at a time!
We’re talking about chemicals: what precautions should we take?
Ferric ammonium citrate is a food additive (E381) and therefore not considered toxic. Potassium ferricyanide, on the other hand, is of low toxicity, being a mild skin and eye irritant. When in doubt, wear protective gloves and goggles, and in any case, don’t use this process to get temporary tattoos on your skin…
Be careful, however: under highly acidic conditions, potassium ferricyanide can release hydrogen cyanide. And we’re talking about a lethal gas here… I don’t know what level of acidity we’re talking about, but if in doubt, don’t play the sorcerer’s apprentice. Let’s take a look at the types of products you can work with safely to modify the rendering of your prints and let your creativity do the talking.
What do you need to get started?
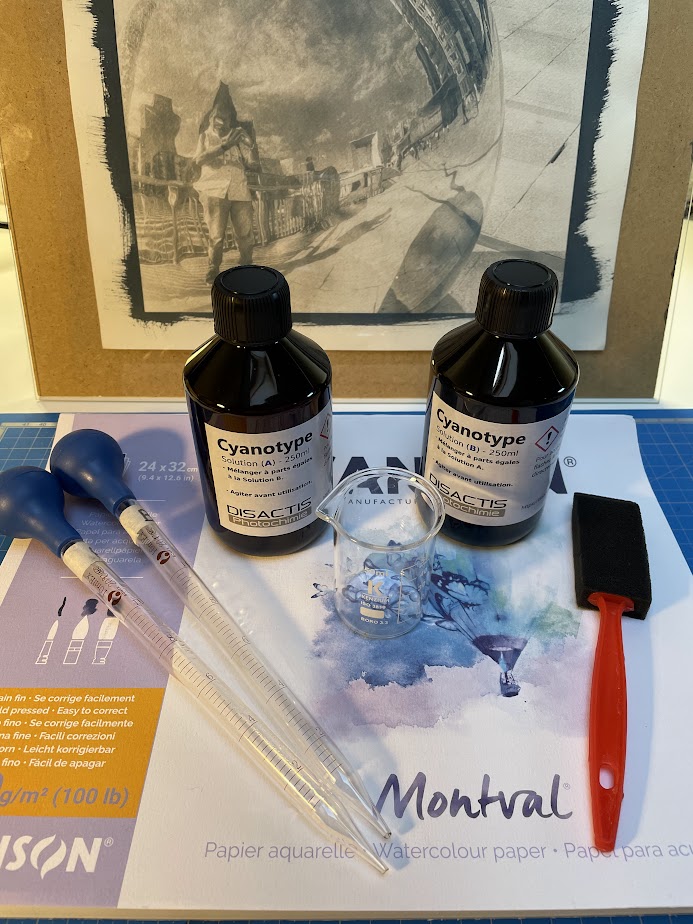
- A cyanotype kit composed of two bottles, “Solution A” and “Solution B”. You can easily find these online, and I recommend the Disactis Photochimie online store. With a 2x 250 ml kit, you’ll have peace of mind for a while.
- 2 pipettes or 2 syringes with a 10ml capacity, so you can accurately measure the quantity of each solution when mixing.
- A small glass container (e.g. yoghurt pot)
- A brush (I use a 30 mm foam brush, but any 3-4 cm wide brush will do)
- Thick, chemically untreated watercolor paper: Canson Montval 200 g offers good value for money for beginners.
- A tank or plastic tray large enough to hold a sheet of paper flat
- A 30×40 cm frame (preferable for photograms, essential for photo prints)
Note: you can find paper on the internet that has already been sensitised with the cyanotype solution. But personally, I find that much of the charm disappears if you don’t prepare your paper, especially as the operation is so simple!
In addition, if you want to make photo prints, you’ll need :
- A computer (Windows / Mac / Linux)
- An inkjet printer (transparencies compatible with inkjet printers are more readily available)
- Transparencies for overhead projectors
- Image processing software. As far as possible, I will try to illustrate the manipulations with Photoshop (paid) and Gimp (free).
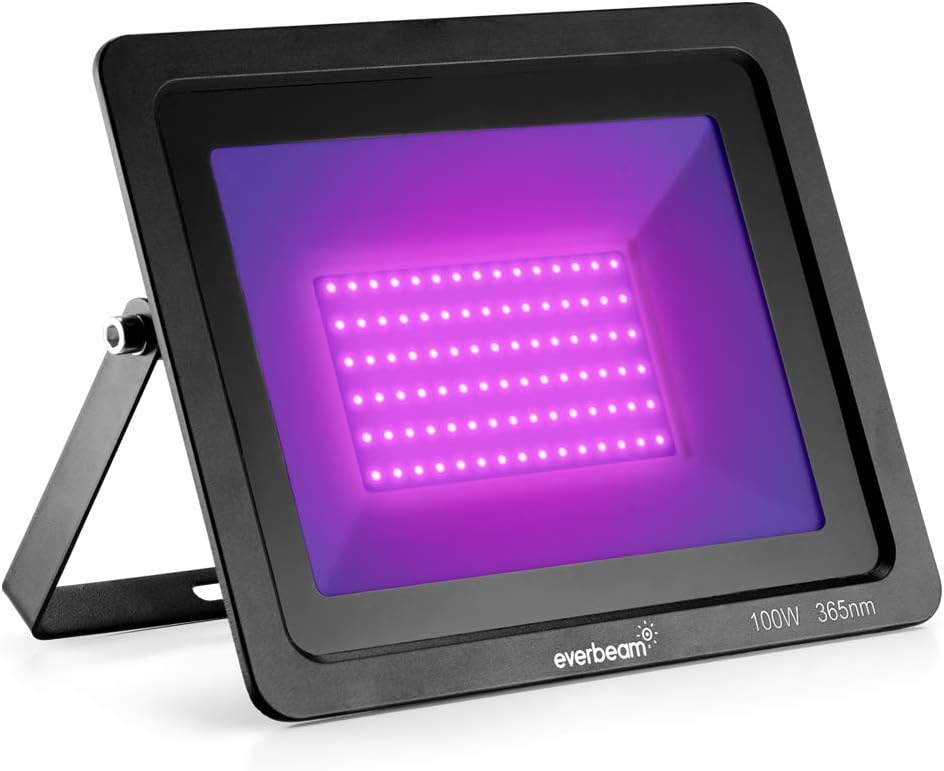
I recommend investing in a UV lamp: you can do without one (the sun generously sends us UV rays from morning to night), but if you want to work at night and on rainy days, if you don’t want to check the UV index before each print, or if you simply want to make life easier for yourself, plan to invest a few dozen euros. Be careful to check the wavelength (365 nm, not 400 nm): many online shops sell simple black-light lamps under the heading “UV lamp”. See the FAQ on this subject.
Warning: do not look directly at the light from a UV lamp, as there is a risk of burning the retina!
Now that you’re all set up, a few words about the workspace
Cyanotype is a photosensitive product, but unlike silver halide, which requires a completely dark room, cyanotype is only sensitive to ultraviolet light. As sensitivity is also much lower than with film, it is possible to work in subdued light: close the shutters and/or curtains and avoid direct light from a lamp. Bear in mind that all LED lamps emit UV: not enough to make a print, but enough to spoil a print. Choose indirect lighting (light from a lamp reflected on the wall), provide a clear working area and protect your work surface and clothes (cyanotype stains!).

Are you equipped? Ready to get started?
See you in the next article for the making of your first photogram!
Thank you for reading! Don't hesitate to leave a comment if you'd like clarification on a specific point, if you're having trouble with a particular step, or if you've seen an error in this article.
You can also register your email address from this page to be notified each time a new article is posted.
Gautier Cuquemelle
Thanks for this.
Thank you, this is just enough information for a first article, I await the next one.